Setting Up SDL2 in Windows 10 & 11 with Visual Studio 2019 as the IDE
Introduction
The Simple DirectMedia Layer is a cross-platform software development package that acts as a hardware abstraction layer for computer multimedia devices.
Video, audio, input devices, CD-ROM, threads, shared object loading, networking, and timers are all managed by SDL. It can handle OpenGL, Vulkan, Metal, or Direct3D11 contexts for 3D graphics (earlier Direct3D version 9 is also supported). SDL is often misunderstood as a gaming engine, but this is not the case.
Setting up SDL2 in Windows (Visual Studio 2019)
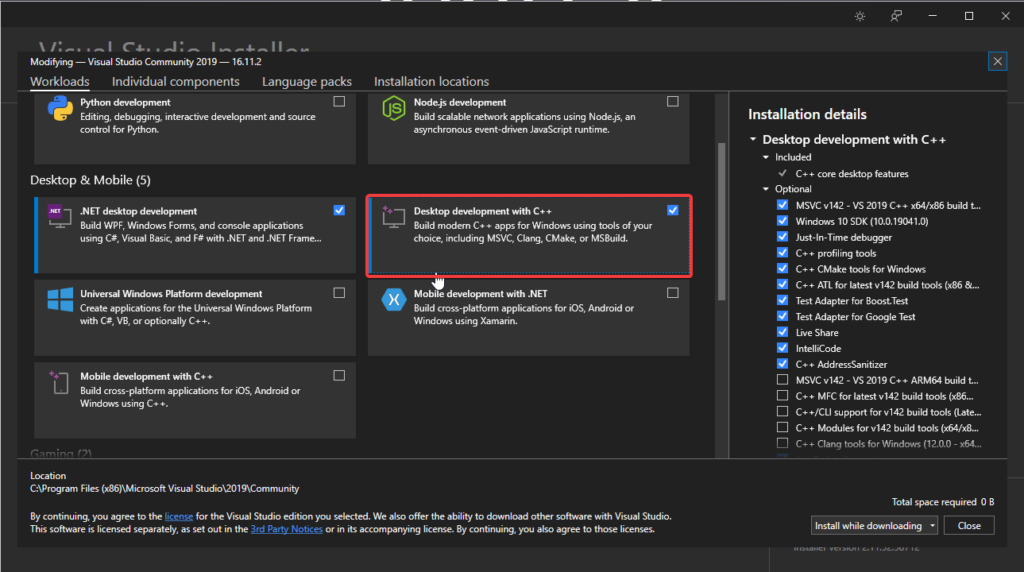
- Open up Visual Studio 2019 and download “Desktop development with C++”, if you have it then we can move to the second step.
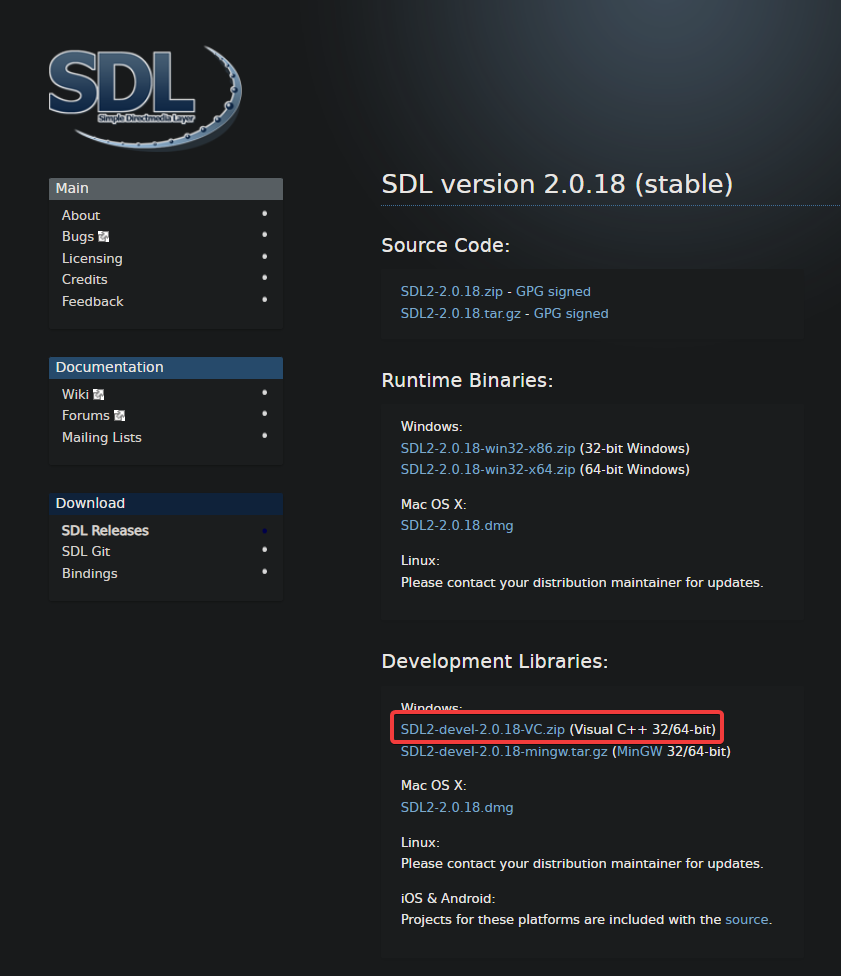
2. First thing you need to do is download SDL 2 headers and binaries. You will find them on the SDL website, specifically on here.
You’ll want to download the Visual C++ development libraries.
Open the zip archive and there should be a folder called SDL2-2.something.something. Copy the contents of the folder and put it anywhere you’d like. I recommend putting it in a folder that you dedicate to holding all your development libraries for Visual C++. For these tutorials I’m putting them in a directory I created called C:\vclib
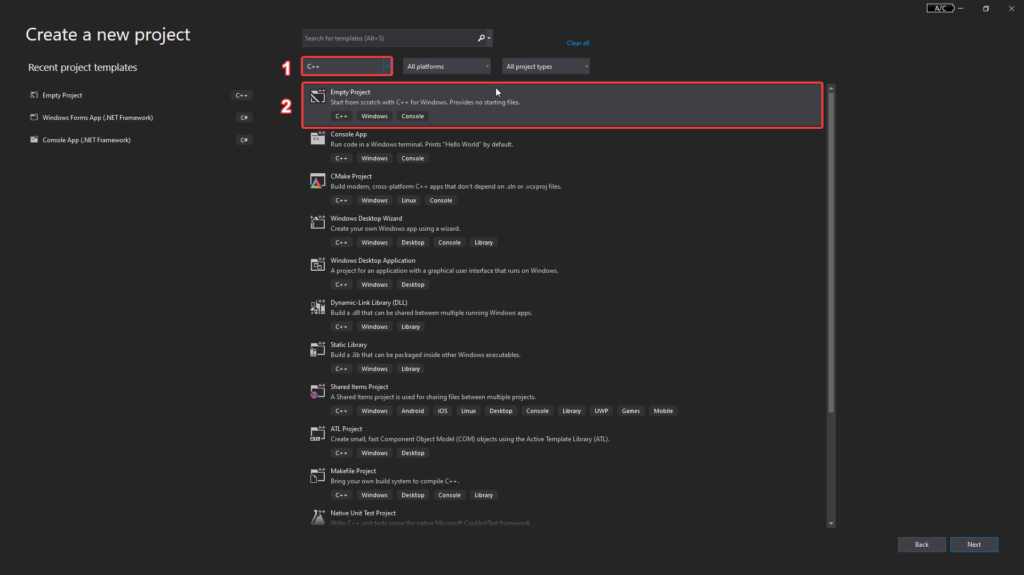
3. Start up Visual Studio and create a new empty C++ project.
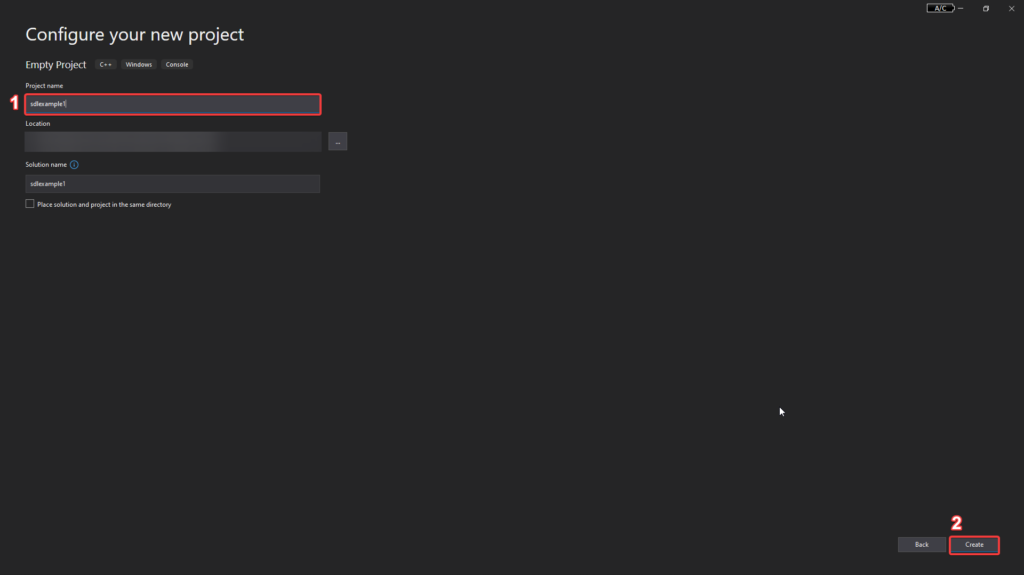
Give your project/solution whatever name you’d like and place it where ever you’d like.
Name your project:
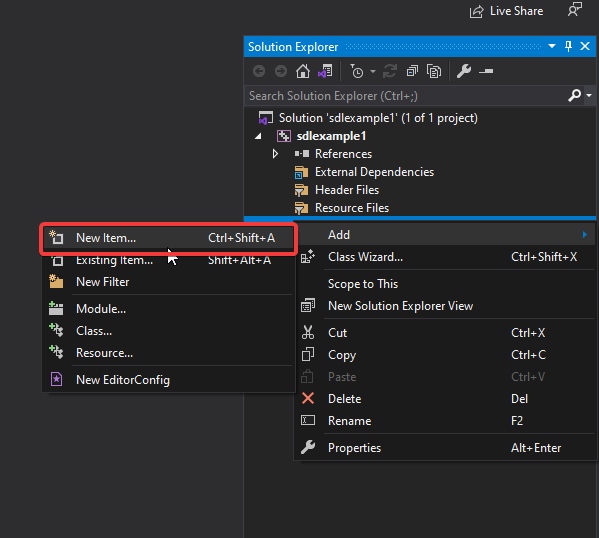
4. Right click on the source files folder in your solution, click on New Item.
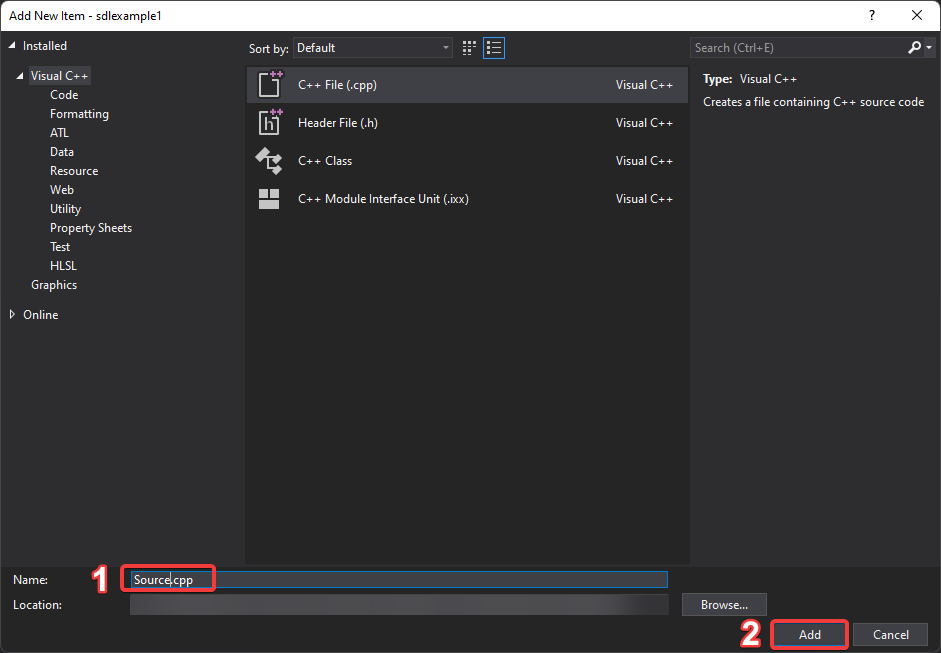
Name your file and add it:
Now paste the following valid sdl2 code in the .cpp file you just added:
#include "SDL.h"
#undef main
#include <iostream>


//don't do this, this is just an example
SDL_Renderer* renderer;
SDL_Window* window;
bool isRunning;
bool fullscreen;
void handleEvents();
void update();
void render();


//please don't put all your code in main like I did.
int main() {

    fullscreen = false;
    int flags = 0;
	flags = SDL_WINDOW_RESIZABLE;
	if (fullscreen) {
		flags = flags | SDL_WINDOW_FULLSCREEN;
	}
	if (SDL_Init(SDL_INIT_EVERYTHING) == 0) {
		std::cout << "Subsystems Initialized!\n";

		window = SDL_CreateWindow("Test Window", SDL_WINDOWPOS_CENTERED,SDL_WINDOWPOS_CENTERED, 500, 500, flags);
		if (window) {
			std::cout << "Window Created!\n";
			SDL_SetWindowMinimumSize(window, 100, 100);
		}
		renderer = SDL_CreateRenderer(window, -1, 0);
		if (renderer) {
			SDL_SetRenderDrawColor(renderer, 121, 121, 121, 255);
			std::cout << "Renderer created!\n";
			SDL_SetRenderDrawBlendMode(renderer, SDL_BLENDMODE_BLEND);
            isRunning = true;
		}

	}

	while(isRunning){
        handleEvents();
        update();
        render();
    }

    //frees memory associated with renderer and window
    SDL_DestroyRenderer(renderer);
	SDL_DestroyWindow(window);	//error here
	SDL_Quit();


	return 0;
}

//handles any events that SDL noticed.
void handleEvents(){
    //the only event we'll check is the  SDL_QUIT event.
    SDL_Event event;
	SDL_PollEvent(&event);


	switch (event.type) {
	case SDL_QUIT:
		isRunning = false;
		break;
	default:
        break;
	}
}

//simple render function
void render(){
    SDL_SetRenderDrawColor(renderer, 121,121,121, 255);
	SDL_RenderClear(renderer);

    //your stuff to render would typically go here.
	SDL_RenderPresent(renderer);
}

//simple update function
void update(){
    //if things could update the code would go in here.
}
5. Now, if your default build setting is Debug x86, you may need to change it:
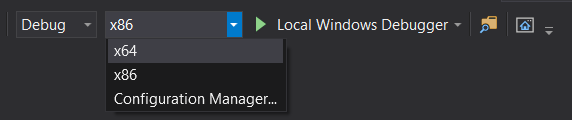
We’ll assume you’re building for Debug x64 for the rest of this example, so make sure your configuration is set to Debug x64. Because libraries differ by configuration, you must add SDL to each configuration you intend to utilize. You’ll need to add SDL2 to each configuration if you wish to build for Release x64 or Debug x86.
6. Build your solution and you should get the following error:
Cannot open include file: ‘SDL.h’: No such file or directory
This means Visual C++ cannot find the SDL header files and you need to add the SDL include folder to the Visual C++ include directories.
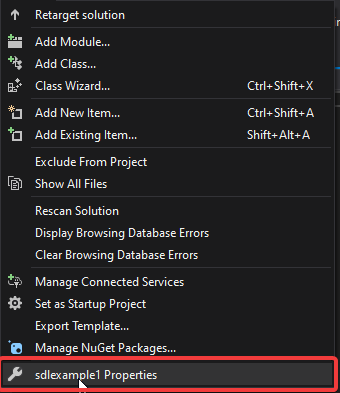
Go to project properties:
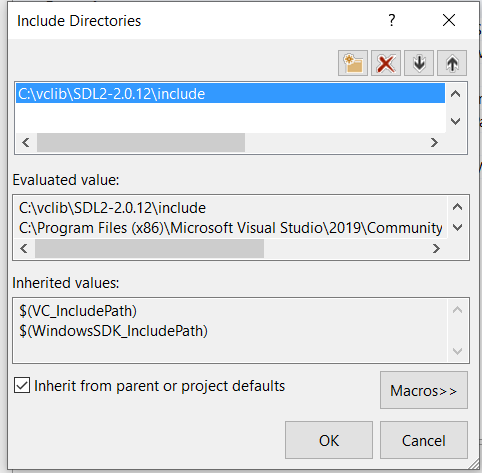
Go to Configuration Properties -> VC++ Directories -> Include Directories -> Edit.
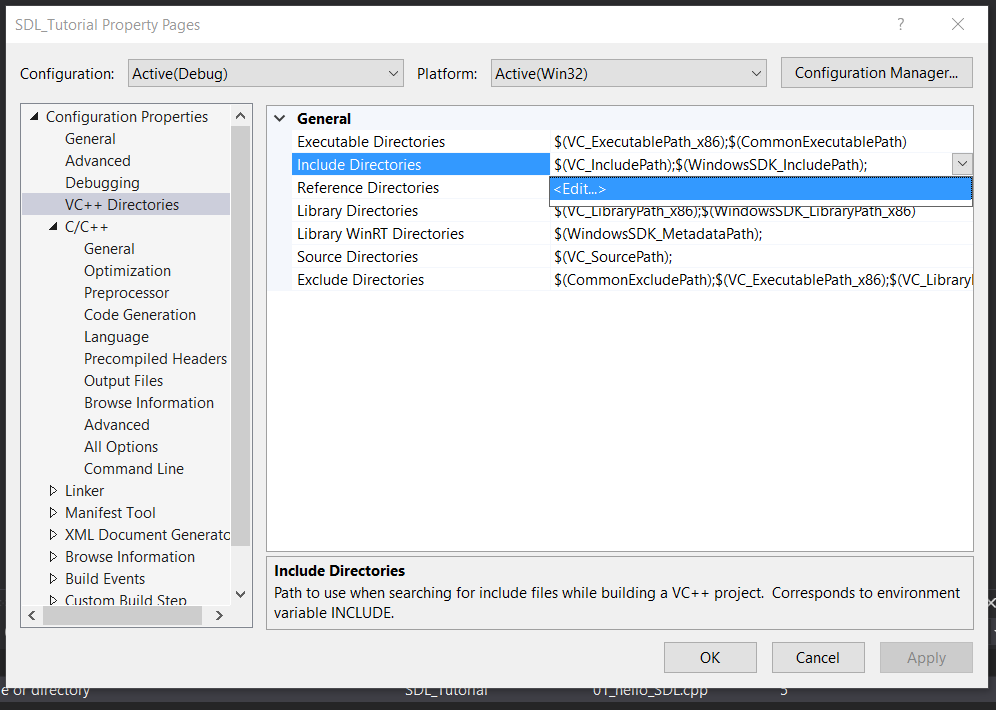
And then add the include directory from the SDL development folder we extracted.
7. Try to build your solution again and you should get a bunch of errors including:
unresolved external symbol SDL_GetError referenced in function SDL_main
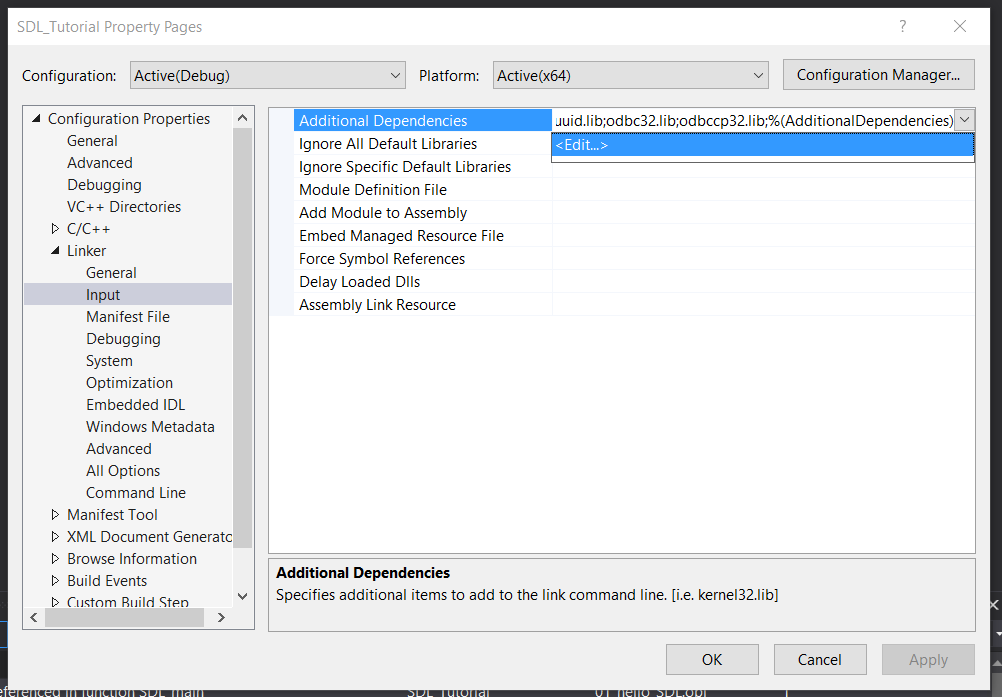
The header file tells the compiler what the SDL functions are, not where to find them. The library file tells the compiler where they are and we need to tell it to use the SDL library file. Go to Configuration Properties -> Linker -> Additional Dependencies -> Edit.
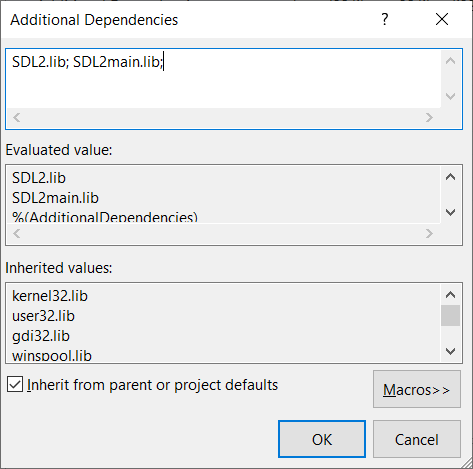
Now add
SDL2.lib; SDL2main.lib;
8. Try to build your solution again and you should get a new error:
cannot open file ‘SDL2.lib’
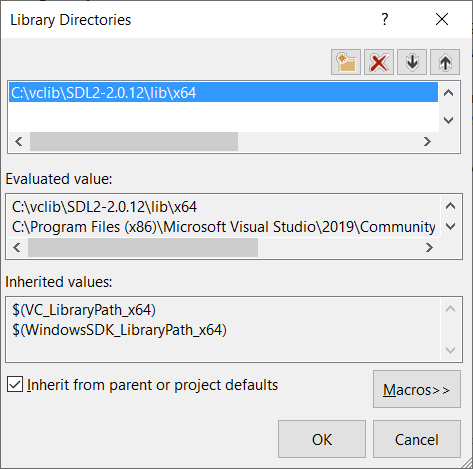
While we did tell Visual C++ to use the SDL library files, we didn’t tell it where to find it. Add the library directory like you did the include directory
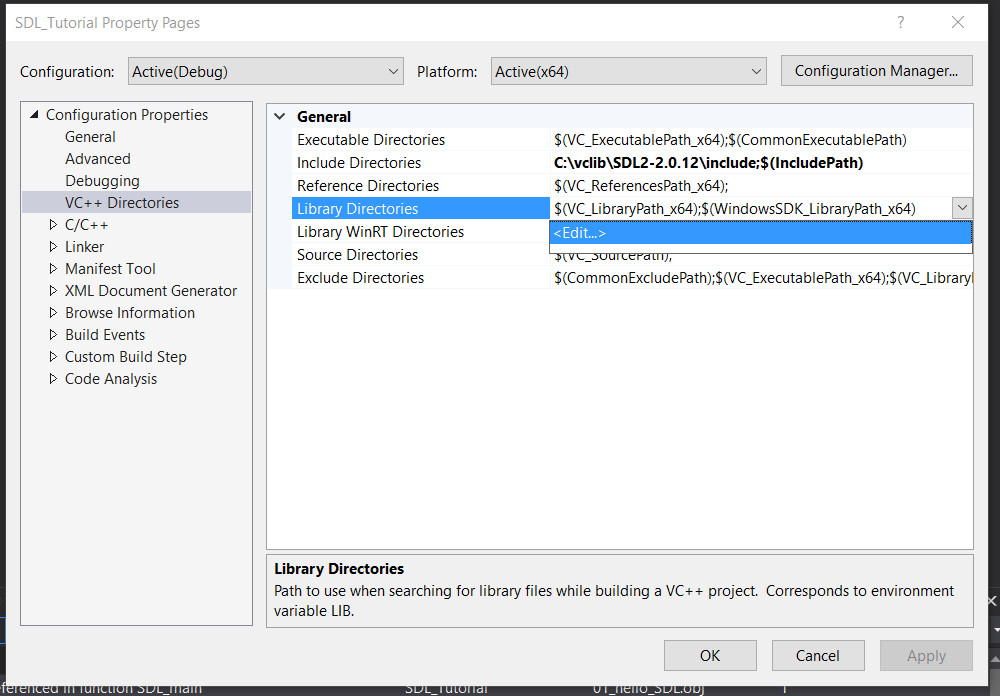
Make sure to add the library that matches your build configuation. If your building for x64, make sure to use the x64 library.
8)Build and your application should build, but try to run it and you’ll get this error:
The code execution cannot proceed because SDL2.dll was not found.
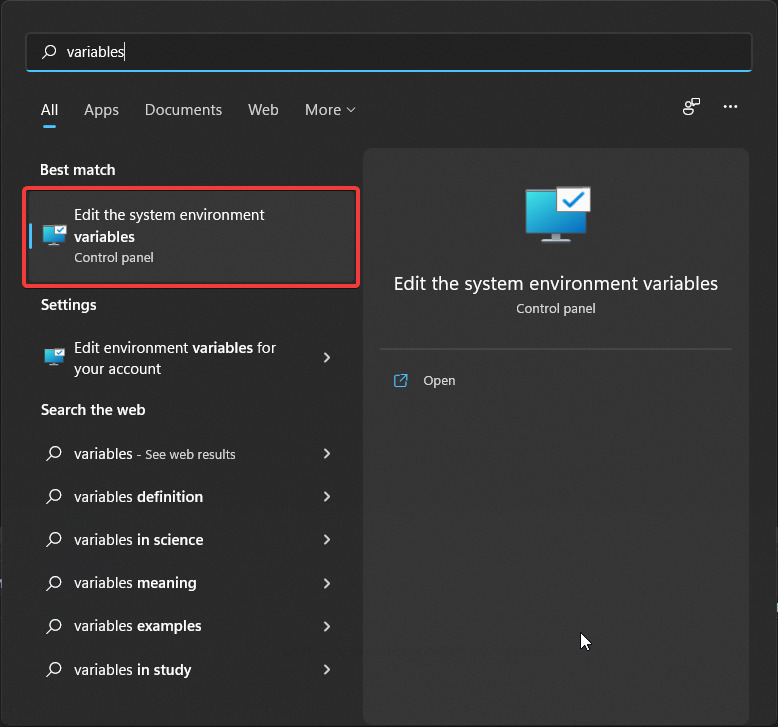
This is because your application needs SDL2.dll to run but can’t find it. Windows uses environment variables to define where to look for dll files. To edit the PATH environment variable. Enter the start button and type variables, click on the first suggestion you get:
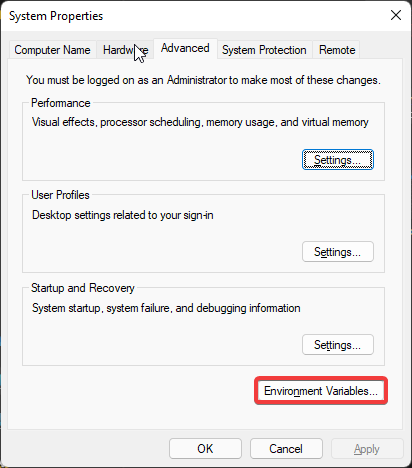
Click environment variables:
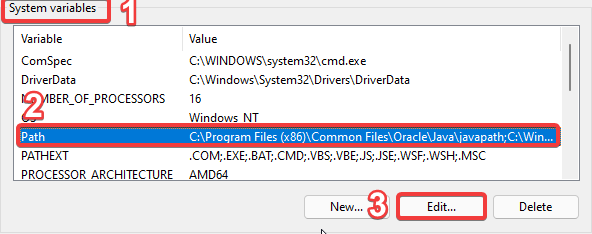
Under System Variables select Path and click Edit
Then click new, then browse to add the lib directory for your build configuration:

Restart Visual Studio so Visual C++ can get the updated path variable, start your program and it should run.

