Quick Start a PHP Project
Introduction
In the beginning, there was nothing. Well, there were static web pages that had to be edited manually. That was a pain. And it didn’t do anything other than display text and images on a web page. With the introduction of PHP/FI (Personal Homepage Tools) in 1995, everything changed. It became possible to create dynamic web applications that generated content on-the-fly and allowed users to interact with the once static web pages.
When Rasmus Lerdorf, the creator of PHP/FI, decided to release the source code of his project, the development went even faster. Andi Gutmans and Zeev Suraski joined the project in 1997 and started working on PHP 3.0 as the official successor of PHP/FI. The development of PHP/FI was mostly halted. PHP 3.0 (which is a recursive acronym for PHP: Hypertext Preprocessor) was officially released in June 1998.
Shortly after the release, Andi and Zeev were already working on a rewrite of PHP’s core. It was finished in mid-1999 and the new engine, dubbed Zend Engine (comprised of parts of their first names, Zeev and Andi), was a huge success. PHP 4.0, based on the new Zend engine, was officially released in May 2000. After four long years, PHP 5.0 was released introducing a new object model and dozens of other new features. In 2010, PHP 5.3.1 is the latest stable release.
What’s PHP?
If you’ve never heard about PHP, even after reading my boring introduction you probably still have no idea what PHP is.
PHP is a scripting language that was originally created for developing dynamic web applications. The difference between PHP and a client-side language like JavaScript is that PHP code is executed on your web server, generating HTML that is then sent to the client. PHP can take an input, such as a date, and then spit out another date (maybe by adding 30 days to it), without showing the process of how that number was derived.
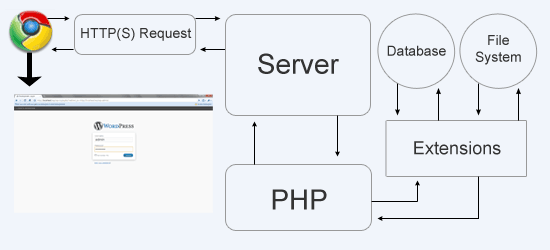 Overview of how PHP works.
The Development Environment
Since PHP is executed on the server, we’ll need one. The best way to develop PHP applications is offline using a server package installed on your computer. Alternatively, you could use a private server.
If you prefer developing on a live web server by FTP’ing your files every time you make changes — although not advisable — I can’t stop you.
But in this PHP tutorial, we’ll do it right and install a server package on our computers: XAMPP.
Installing XAMPP
It’s possible to download Apache (the name of the web server software) and PHP individually and then set it up manually. However, its way easier to use XAMPP, a bundled package containing the software we’ll need.
To install XAMPP, we obviously need to download it first. Go to the XAMPP website, select your operating system and start downloading the basic package. XAMPP is cross-platform, so it’s available for the Mac OS, Windows, and Linux.
When your download is finished, open it.
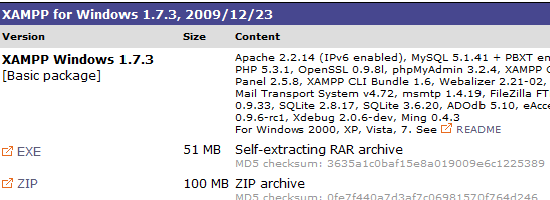 If you are using Windows like I am, pick this version.
An installation wizard will pop up when you run the executable file. You only have to specify a path (the default value is fine) and you are good to go. Because a lot of files are being copied, this might take a while.

This might take a while…
When it’s done copying files, a command screen will appear. It’ll ask you a few questions but most of them are just personal preferences. If you have no idea which option you should choose, just accept the default settings.
After a few questions, it’s done configuring and you’ll be asked what you want to do next.
Let’s disable HTTPS, Perl, and ASP. We are disabling them because we won’t need them. If you do want to use these later on (HTTPS is especially nice if you are developing a financial app or something that needs a secure transfer protocol), you can enable them at that point in time.
When the installation is complete, open the XAMPP Control Panel.
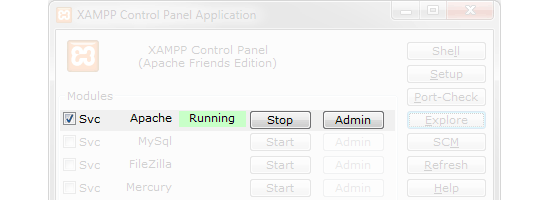 This is what your XAMPP Control Panel should look like.
On the XAMPP Control Panel, click the first Start button to start the Apache software. If you don’t want to open the control panel every time you want to start Apache, press the first SVC button. Press the Exit button to close the Control Panel.
Congratulations, your web server is ready for use! Point your web browser to http://localhost, take a deep breath and keep your fingers crossed.
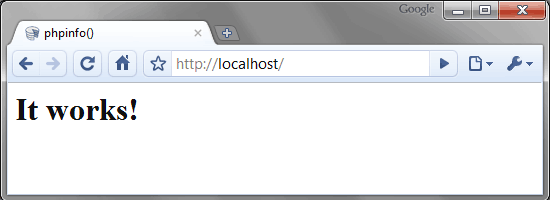 If all goes well, you will see this default message.
Picking a Source Code Editor
Writing PHP code in your regular word-processing editor like Microsoft Word is not an option. It’ll add all sorts of junk (e.g. style definitions, proprietary characters, etc.) to your document — and PHP isn’t able to process that junk.
You’ll need a text editor like Notepad — or better yet Notepad++. Text editors produce plaintext and that’s the only thing PHP understands.
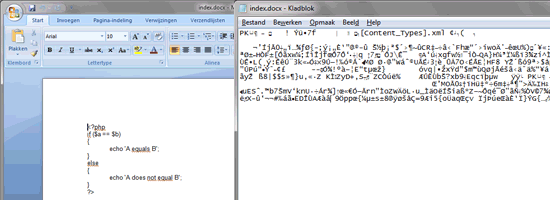 Junk! Open one of your Word documents with Notepad to find out what I am talking about.
Syntax Highlighting is Important
So you open Notepad and you’re ready to start writing a few lines of code. It’s time to test what you’ve written and PHP tells you that you forgot a single quote on line X, and it is therefore unable to run your script. If you are working with “a few lines of code,” it won’t be hard to determine where you forgot the single quote.
But what if there are a “few thousand lines of code”?
Meet syntax highlighting. When enabled, instructions, declarations and so forth will have their own color (it’s not added to the document, so no junk!). Even without knowing what the following piece of code does, it will only take a second to find the missing single quote.
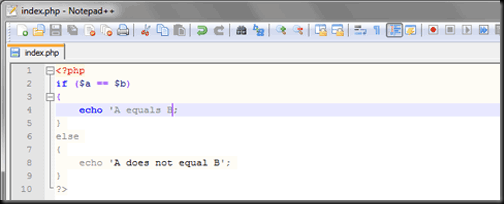
There are a lot of source code editors which offer syntax highlighting. (Check out this list of text editors for developers.)
Most source code editors have many other useful options (and some of them even have too many options). I prefer Notepad++ because it’s lightweight, simple to use and has everything you’ll need. Oh, and it’s open source — that’s always nice.
Is PHP Installed?
We’ve got a web server up and running and installed (XAMPP), a source code editor (Notepad++ or your preferred source code editor) — but we haven’t checked whether PHP is installed correctly or not.
If you are unsure of your web host’s capability to run PHP, it’s recommended to follow this part.
Open Notepad++. Copy and paste the following into a new text document and save it as info.php (or any file name that you’ll remember) in your webroot.
<?php
phpinfo();
?>
The webroot is the directory which Apache uses to retrieve files from. For example, the webroot of Six Revisions contains a WordPress installation. As soon as a browser performs an HTTP request for sixrevisions.com, Apache (the server software that runs Six Revisions) will try to find a index.* file and will send it back to the browser (the client). If it’s not found, a list of files will be returned (if the Apache configuration allows directory listing — but at Six Revisions, it doesn’t).
Your webroot can be found in xampphtdocs (the default value for Windows is C:xampphtdocs).
If you are using a web host, your provider should have given you FTP details for accessing the webroot so that you can transfer your files to your web server.
Now point your browser to http://localhost/info.php (if you’re using XAMPP). If the page looks similar to the image below, PHP is installed correctly!
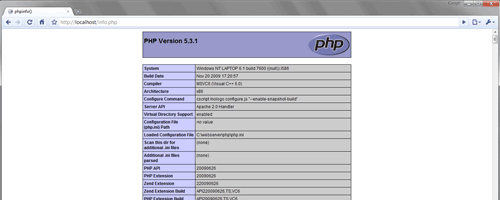
PHP is installed correctly!
You just ran your first PHP script! phpinfo() is a PHP function which outputs information about PHP’s configuration on your web server. You’ll find that when you’re working on a new server environment, phpinfo() will be a function you’ll use at least once to see what the PHP and server configurations are. This function is also used in debugging migration issues; if you transferred a website to another web server and it suddenly breaks, you can check the PHP information on the new server to see differences between the old and new server.
If nothing happened, PHP isn’t installed correctly and thus the PHP code will not be parsed. Your browser will not recognize the <?php ?> tags and it’ll just ignore them.
The PHP Block
PHP is a beautiful language. As long as the web server knows that a specific file has to be checked by the PHP parser, you are free to put PHP blocks anywhere you want. A PHP block you say?
A PHP block is nothing more than a piece of PHP code. By having a PHP block in a specific file, PHP can easily find and process a block of PHP code.
Imagine the time it would take to process all the contents of a file to determine whether it contains PHP code or not! That’s why a PHP block is needed.
It takes only five characters to open a PHP block (<?php) and two to close it (?>). They look like HTML tags, but they give you the ability to do a lot more than HTML is capable of. Let’s try it out, shall we?
Note: Some servers have the option to use the short opening tag (<?) enabled. It’s been recommended for several years that you should not use the short tag and instead use the full <?php and ?> tag combination. With the widespread use of XML and use of these tags by other languages, the server can become easily confused and end up parsing the wrong code in the wrong context!
Go to your webroot (there are probably already some files in there, feel free to delete them if you want, we don’t need them) and create a new file called index.php and fill up the file as if it was a new HTML file. Or if you are lazy, just copy and paste it from below.
<!DOCTYPE html>
<html>
<head>
	<title>My first PHP script</title>
</head>
<body>

</body>
</html>
Now it’s a piece of cake to put a PHP block between the opening and closing body tag.
<!DOCTYPE html>
<html>
<head>
	<title>My first PHP script</title>
</head>
<body>
<?php
	// Your Block of PHP Code
?>
</body>
</html>
By pointing your browser to http://localhost, the index.php file will be served to your browser by default. You shouldn’t need to type http://localhost/index.php.
It’s just a blank file, nothing interesting. However, if we look at the source of the web page (right-click to view source in your web browser), we see the regular HTML tags but without a trace of the PHP block.
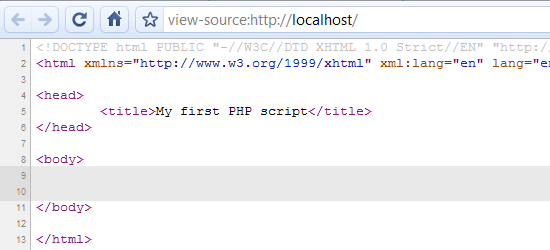 It has been removed by the PHP parser.
Because our PHP block didn’t contain any executable lines of code, nothing else happened.
If the PHP block would have contained executable lines of code, the PHP parser would have processed them, but would still remove the complete PHP block afterwards so that your code isn’t shown to the public.
Hello World!
Our previous PHP script didn’t do anything; it’s time to change that.
Open the index.php file again and create a new line in the PHP block.
Put the line below inside the PHP block, save the file and then refresh your web browser.
echo 'Hello World!';
Your code should resemble the following.
<body>
<?php
echo 'Hello World!';
?>
</body>
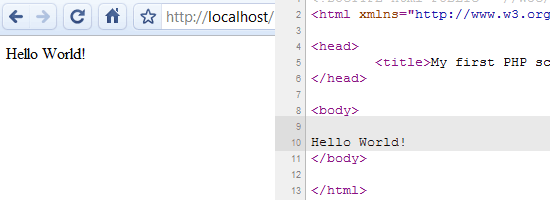
Congratulations, you just ran your first working PHP script! Your browser should be showing “Hello World!”
You really did not need to use PHP to create a page like this; it’s just a tradition in the programming world to start learning a new language by trying to output these characters on the screen.
Yet again, the PHP block magically disappeared.
So what exactly is that line of PHP code? As you’ve seen, the characters between the single quotes have appeared on the screen. echo is a PHP function which takes care of that. echo would be analogous to the .write() method in JavaScript (as in document.write('Hello World!')).
Normally, a PHP function is called by writing down its name, followed by an opening and closing parenthesis. Because echo is a language construct of PHP, which means that it’s hard-baked into the language and not actually a function, the parentheses are not required. The last character of the line is always appended after a PHP statement.
With the echo function, it’s also possible to send HTML to the browser. In these examples, you could just as well use HTML instead of doing it via PHP; it’s just for illustrative purposes.
Escape Characters
echo '<p>Hello <strong>world</strong>!</p>';
Everybody likes to have his or her HTML full of indentation for readability. Because PHP deletes a linefeed (tabs, returns, spaces and such) immediately after the closing PHP tag, your HTML markup will not be properly formatted with indentation, which can make it hard to read.
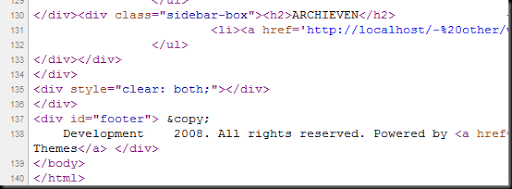
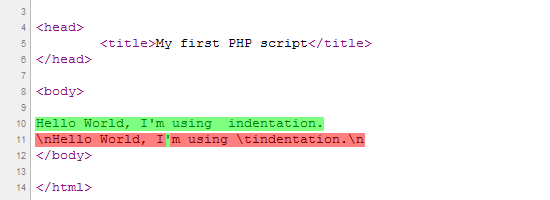
Sometimes you might want to specify indentation in an echo statement. This is done by including the linefeeds in your echo statement by escaping characters.
Note that manually including the linefeeds in an echo statement with only a single quote will not work. This is because PHP doesn’t scan echo statements with only one quote for escaped characters and treats it as a literal string except when a single apostrophe is escaped with a backslash ().
echo "\nHello World, I'm using \tindentation.\n";
This code, for example, will produce an error:
echo 'I'm PHP';
It produces an error because the string is being terminated incorrectly.
To fix this, you can do one of the following:
// Escape the apostrophe with a backslash
echo 'I'm PHP';
// Use double quotes
echo "I'm PHP";

 Yet again, the PHP block magically disappeared.
